Send Gmail from your custom domain
This guide assumes you’ve already set up email forwarding on your domain — if not, start with the GoDaddy walkthrough for the registrar flow, or add your domain in EForw and follow the DNS records it gives you.
Once incoming mail is flowing into your real Gmail inbox, here’s how to make outgoing replies appear from you@yourdomain.com.
1. Turn on 2-step verification
Open google.com/landing/2step and enable 2-step verification on the Gmail account. App passwords require it.
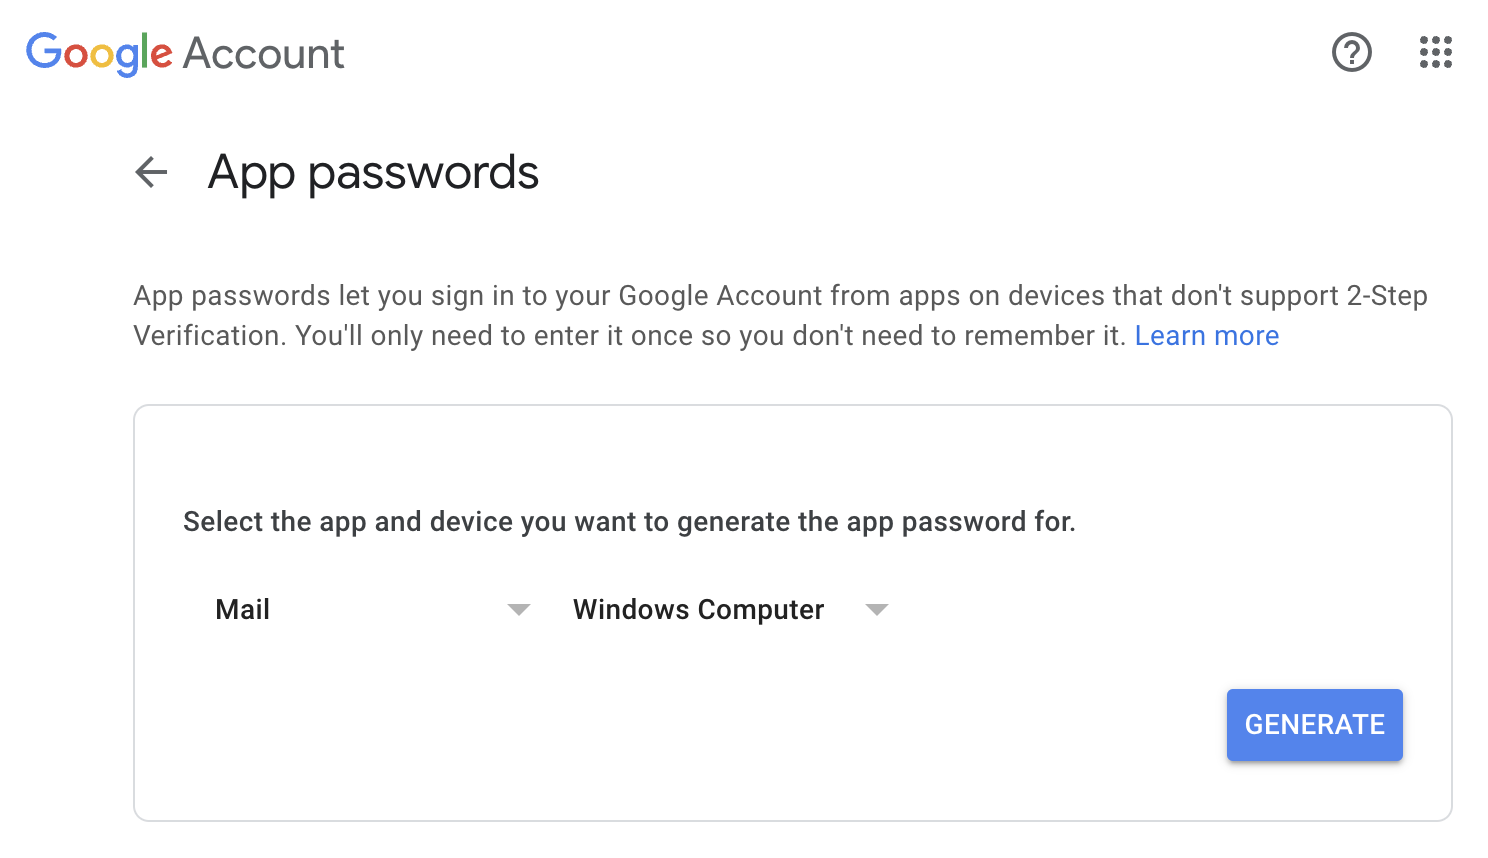
2. Generate an app password
Go to myaccount.google.com/apppasswords and create a new app password — name it after the alias you’ll use, e.g. admin@mydomain.com. Copy the generated password; you’ll need it in step 4.
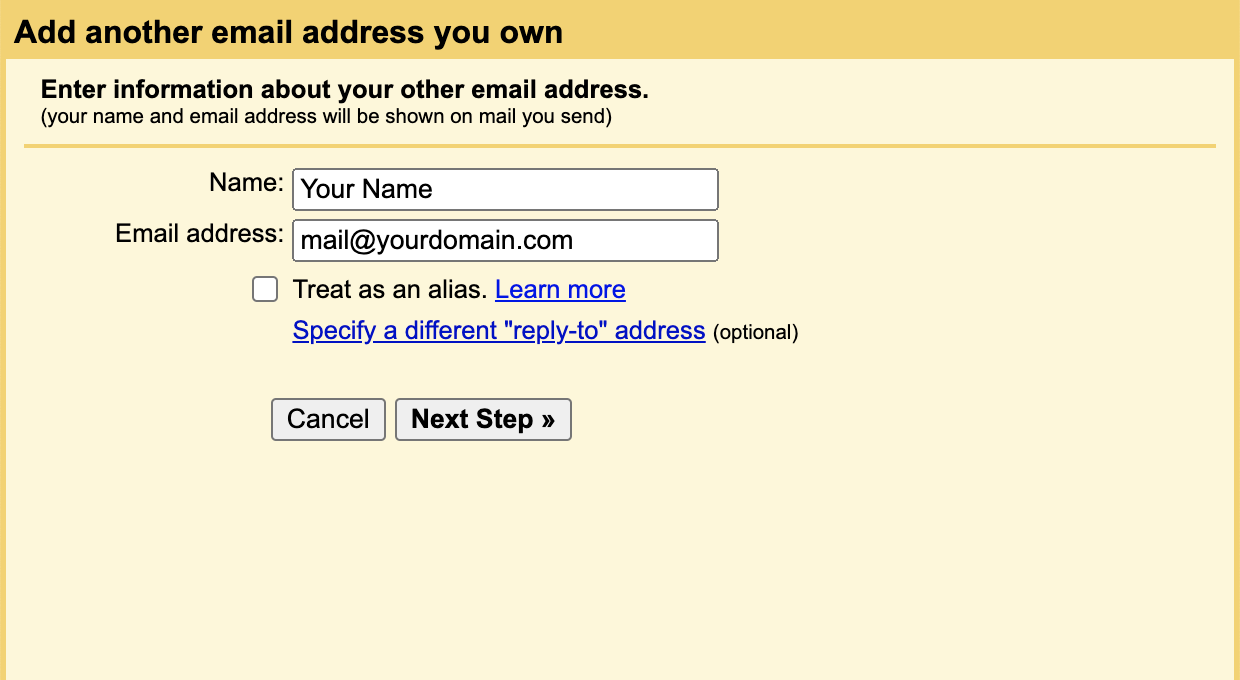
3. Add the alias in Gmail
In Gmail: Settings → Accounts and Import → Send mail as → Add another email address.
- Enter your alias (
admin@mydomain.com) and the sender name you want recipients to see. - Uncheck “Treat as an alias.” Gmail’s “alias” mode hides the original sender, which is the opposite of what you want here.
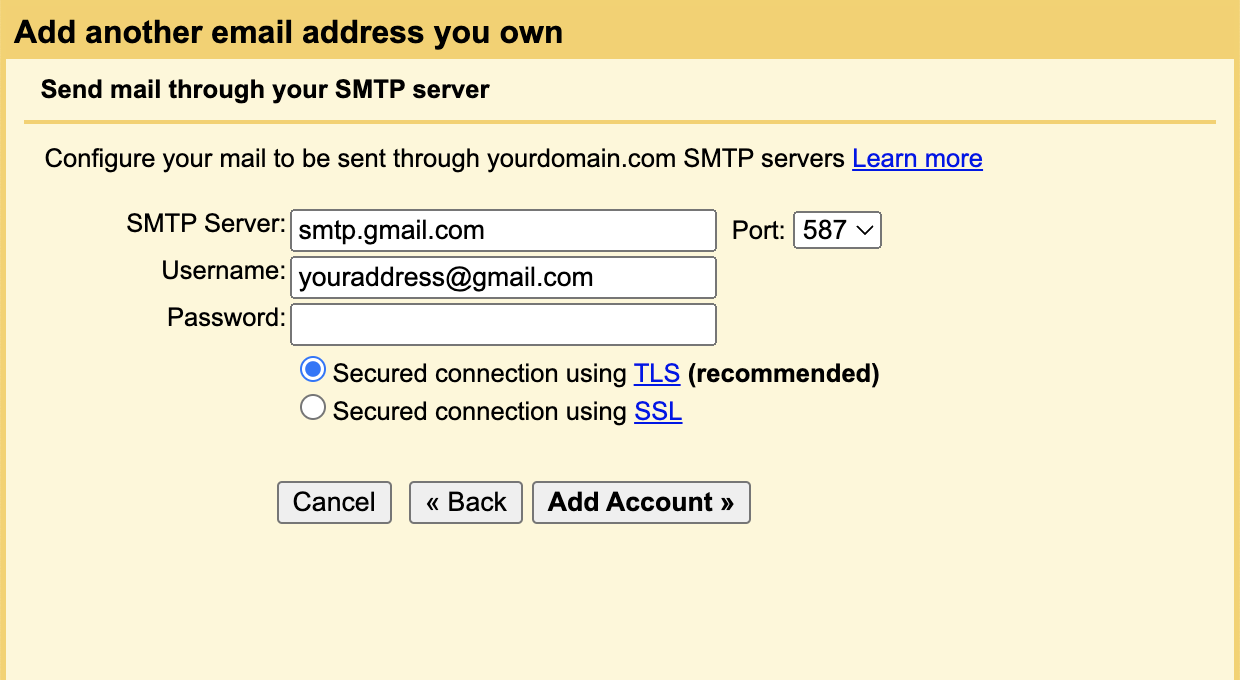
4. SMTP settings
When Gmail prompts for SMTP details:
- Server:
smtp.gmail.com - Username: your full Gmail address (including
@gmail.com) - Password: the app password from step 2
- Leave TLS enabled.
5. Confirm and send
Google sends a verification code to the alias. Because mail is forwarding to this same Gmail inbox, you’ll get the code immediately — paste it into the popup and you’re done.
In the compose window, the From dropdown now offers your alias. Replies to messages forwarded by EForw default to the alias automatically, so you can usually just hit Reply.